Getting MMD
Before we get to using MMD, download it from the Downloads page if you haven't already. I suggest you download a few models as well, or use the models MMD comes with. You can find those by going through these steps:
Open MMD folder>UserFile>Models>and select whichever ones sounds pleasing to you.
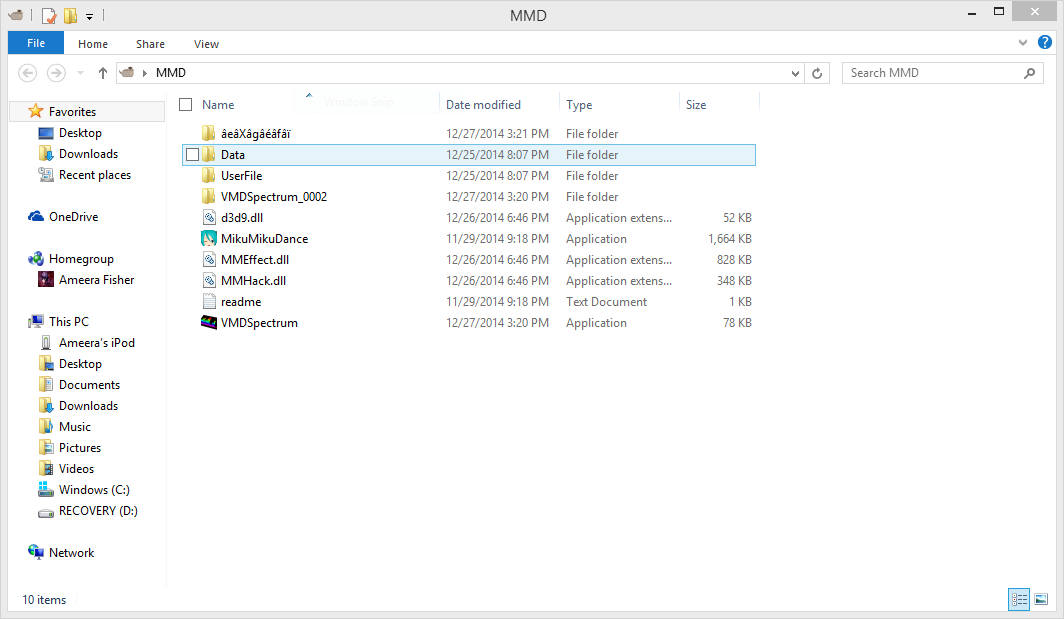
Tip: For MMD to work correctly, you must leave all files that came with MMD and the application itself in a folder together, below is an example of my MMD folder. This applies to models as well. Ignore the things in my folder like d3d9.dll or VMDSpectrum, those are for different plugins and programs for MMD.
Open MMD folder>UserFile>Models>and select whichever ones sounds pleasing to you.
Tip: For MMD to work correctly, you must leave all files that came with MMD and the application itself in a folder together, below is an example of my MMD folder. This applies to models as well. Ignore the things in my folder like d3d9.dll or VMDSpectrum, those are for different plugins and programs for MMD.
Loading Models
Now that you have the program, lets open it.
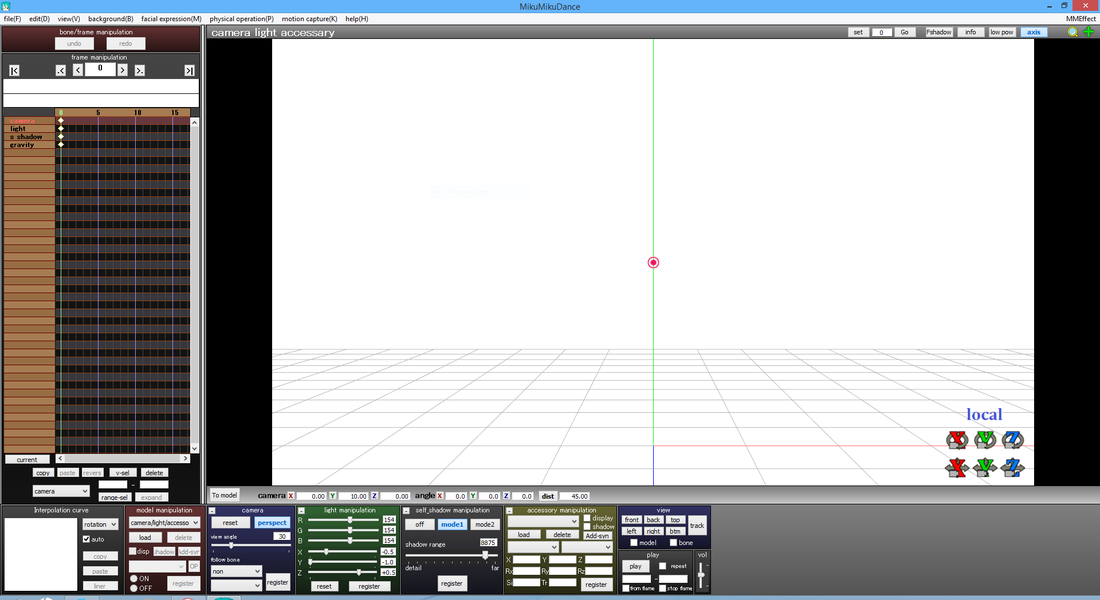
When you open it, it should look something like this.
To load a model, go to the "Model Manipulation" box and click "Load".
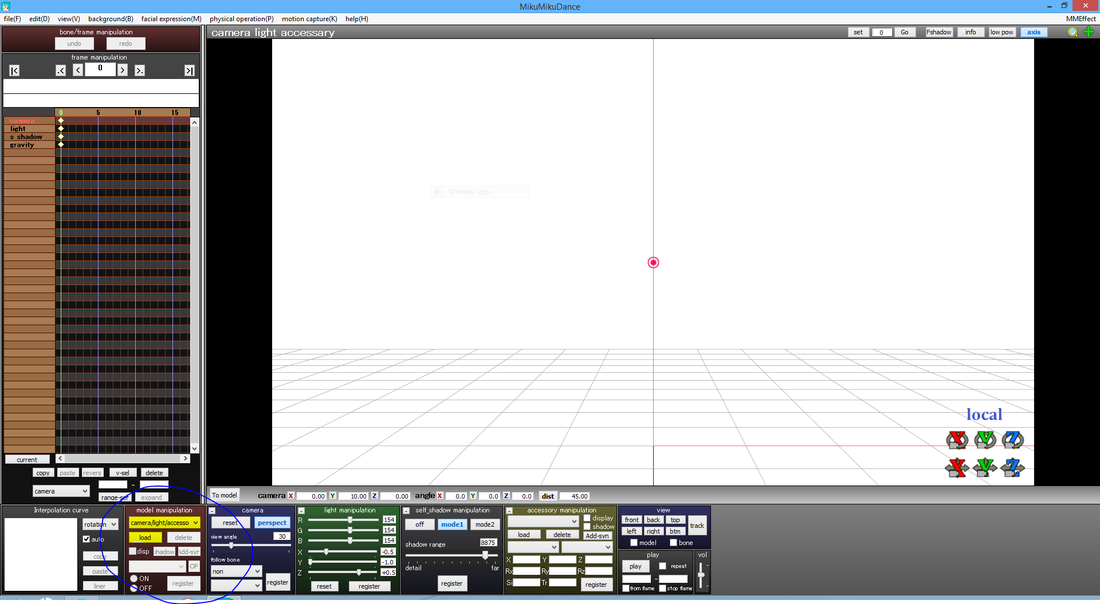
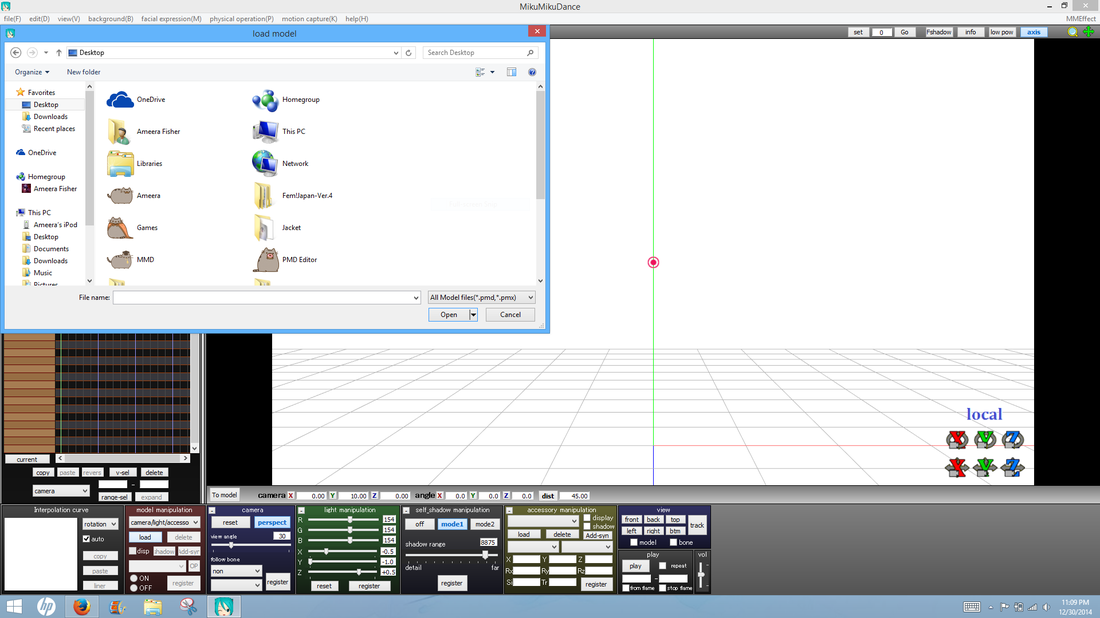
You should get the browsing window when you hit it. So simply go to the folder of the model you wish to open and load the .PMD or .PMX file.
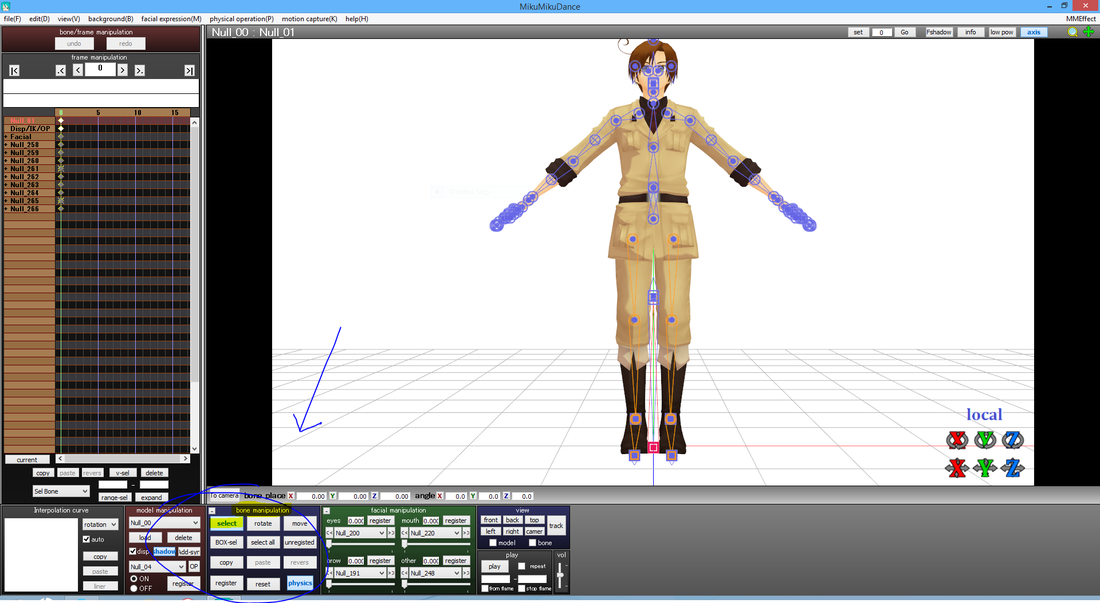
Wait, what's wrong with it? Just simply go to the "Bone Manipulation" box and press "Select". Now the bones aren't displayed and you can view your model. When you need to pose the model or move it, just hit select again to see the bones. When you hit Play, the bones will not be visible even if they are selected.
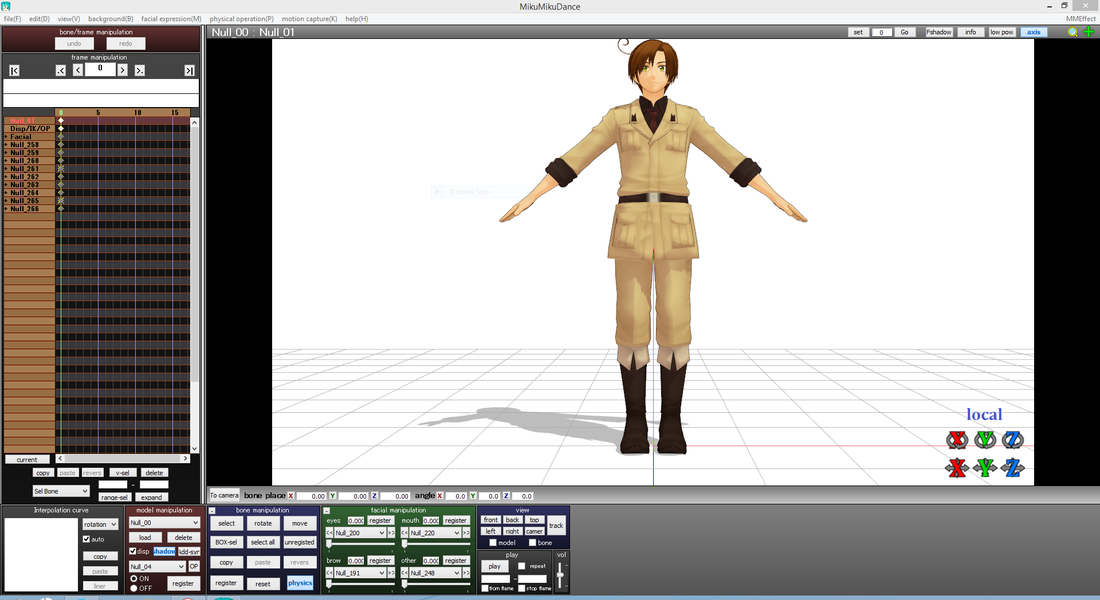
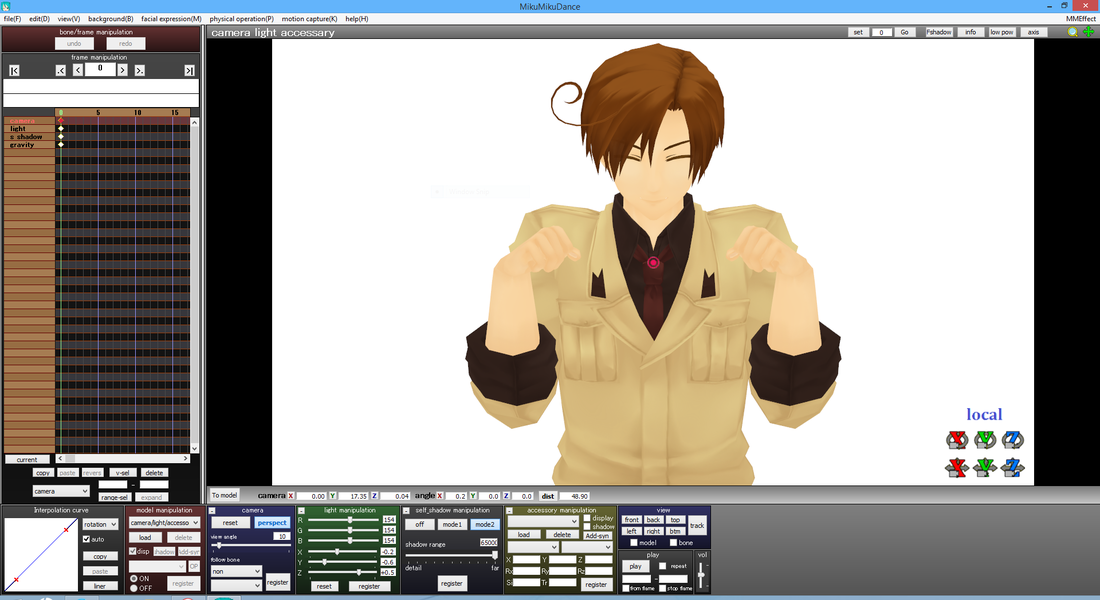
Now you can see your model!
Better Appearance
Here I'll give you a few simple things to enhance your MMD.
What I want you to do first is remove the Coordinate Axis. The Coordinate Axis are the grid lines throughout the white plane. Go up to the top tab that says "View", and select "Display Coordinate Axis". It will de-select the Coordinate Axis display.

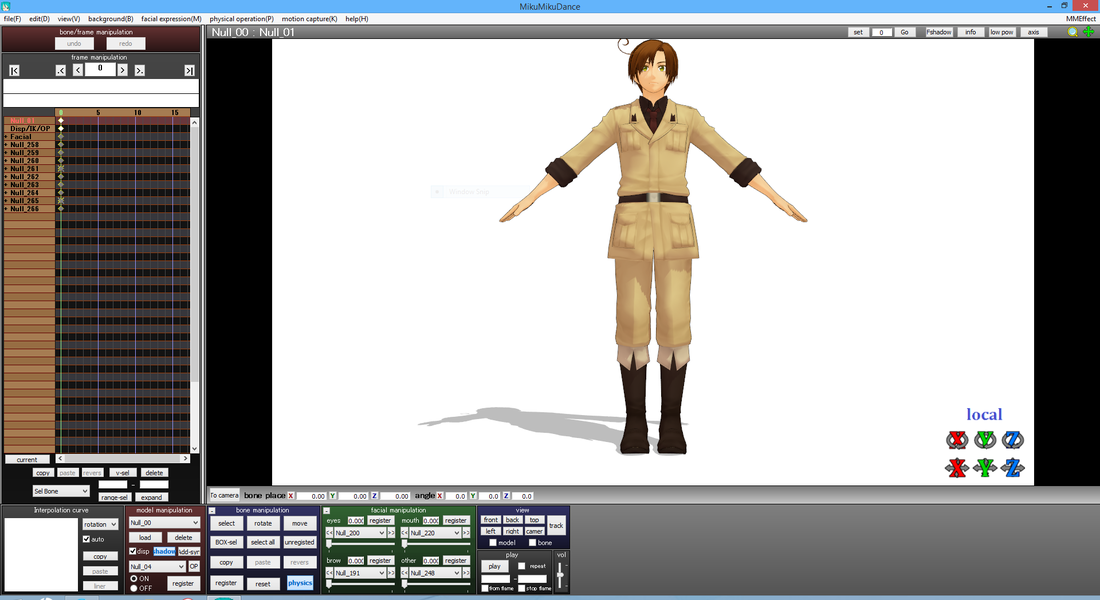
Now it's gone.
Tip: If you are making motion data or things like that, you'll probably want to keep the coordinate axis to help you. For our case, it doesn't help at all, and it looks ugly.
Tip: If you are making motion data or things like that, you'll probably want to keep the coordinate axis to help you. For our case, it doesn't help at all, and it looks ugly.
Now I would like for you to turn off the Edge Line. The Edge Lines are the black outlines around the model's body. (Now this is optional. Some people like to keep the lines around the model, so you can skip this if you'd like. I prefer my models without edge lines, though) Go up to the "View" tab once more and click "Thickness of Edge Line". This should come up:
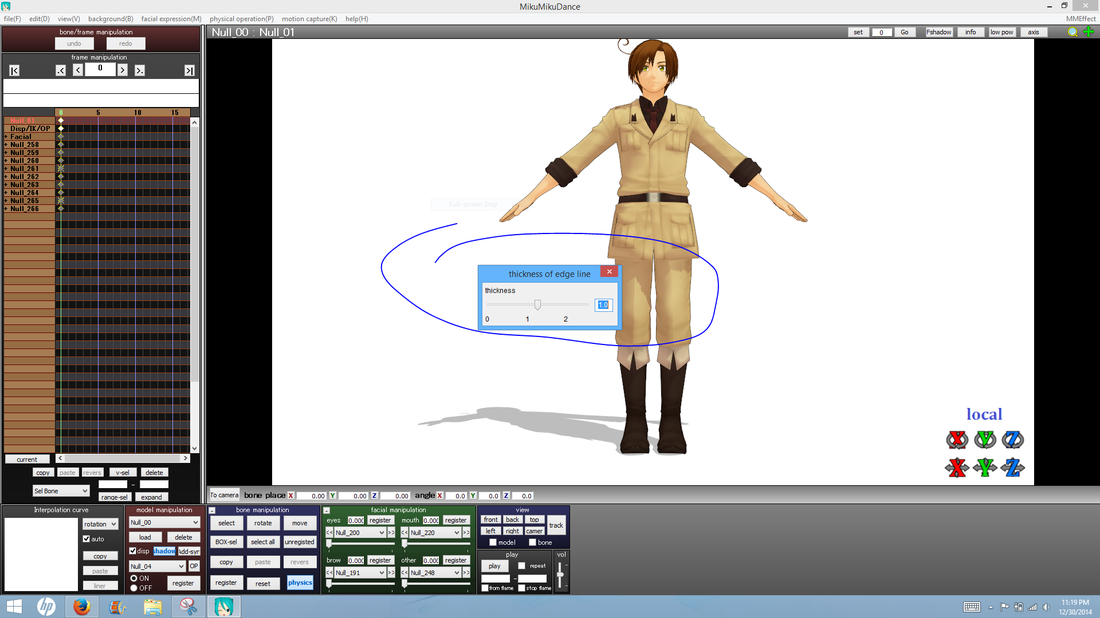
Move the pointer to 0 for no lines, and if you'd like to have thick lines, move it all the way to the right.

Now the lines are gone!
Lastly, I personally like having the large screen for when I render images and videos so they'll be large clear files. So, go to the "View" tab once more, and select "Screen Size".

I don't remember what MMD has it's screen size when you first use it, but I have mine at 2560 x 1500 currently. This makes the MMDs very crisp and clear when you go to render them. MMD's default screen size is rather low, I think.
Tip: If you have a low quality computer, you may not be able to render images or videos using a large window size. I believe the biggest you can do is 1500 x 720 or 1200 x 500. I don't remember, but you'll know if you save a picture and it saves it as a black rectangle, you'll need to make the screen size smaller.
Tip: If you have a low quality computer, you may not be able to render images or videos using a large window size. I believe the biggest you can do is 1500 x 720 or 1200 x 500. I don't remember, but you'll know if you save a picture and it saves it as a black rectangle, you'll need to make the screen size smaller.
Loading Motion/WAV
This next tutorial is for adding motion data/pose data/camera data to the MMD/model, and the music. If you don't have any of these, go to the Downloads page and download some of the samples I uploaded for you.
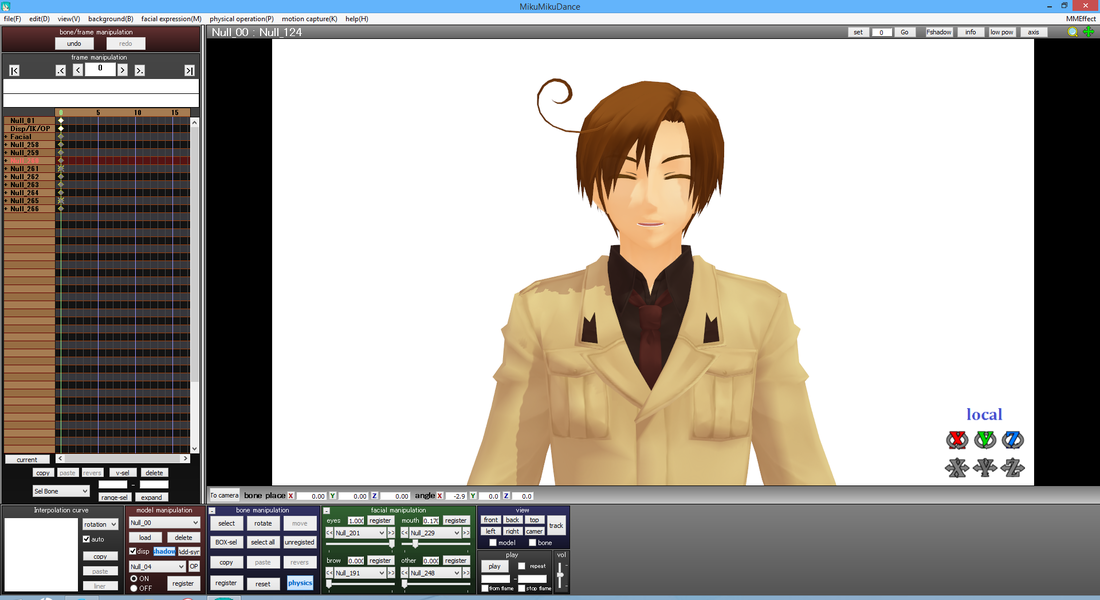
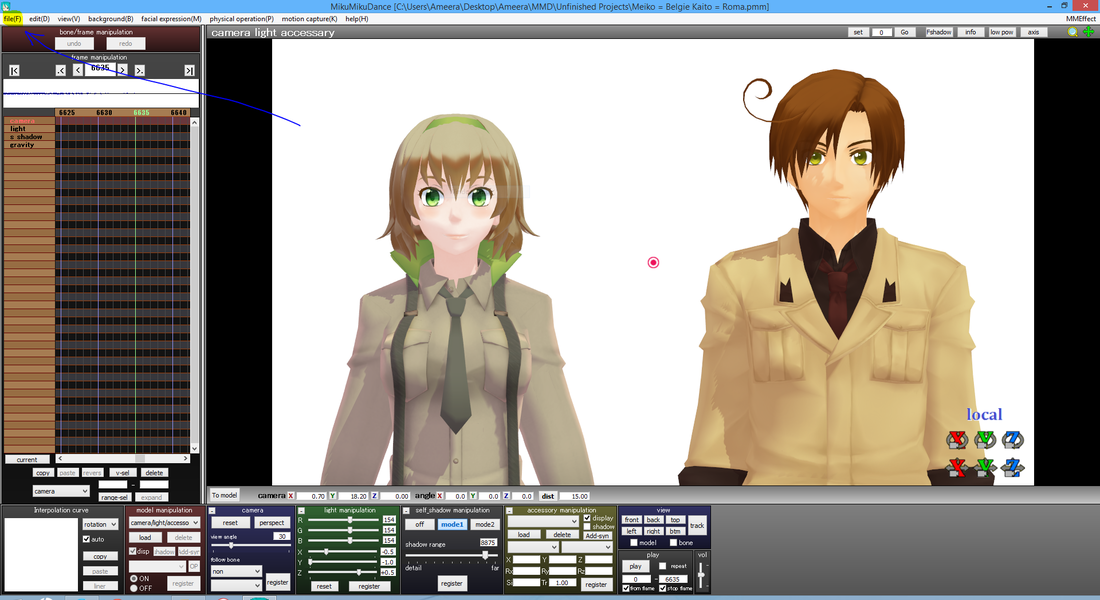
To load a motion into your mode (not the camera), you must make sure you are on the model's screen. So check the "Model Manipulation" box and if the box shows the model, then it is on the right screen. Also, some models aren't named right, or the name was messed up through language translation. So if the model is possibly named "Null", or some weird characters, it's the model. Just make sure the tab doesn't say "Camera/light/accessory".
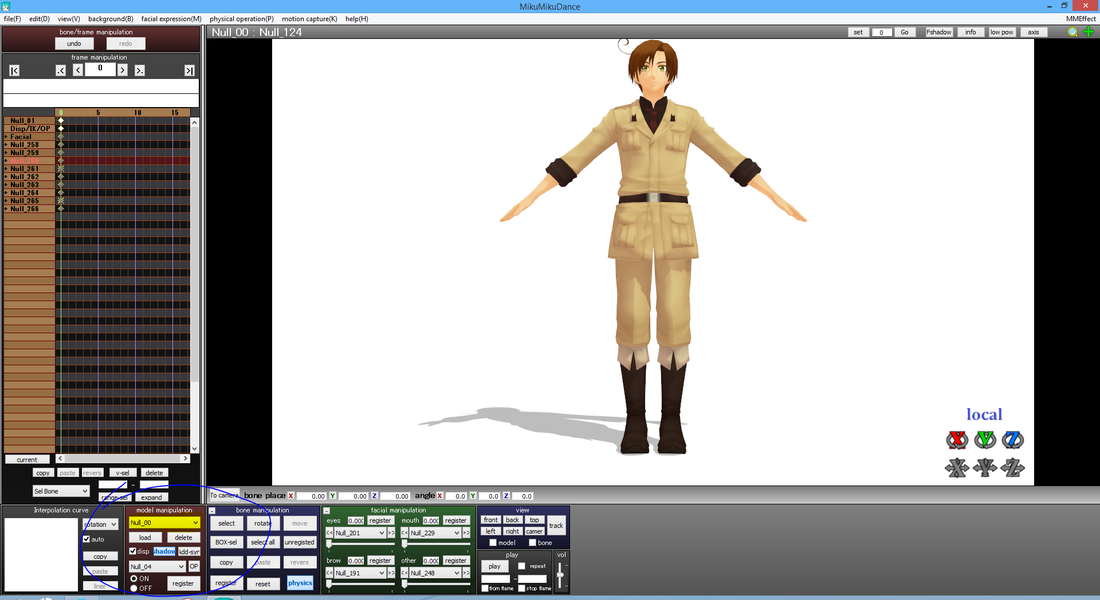
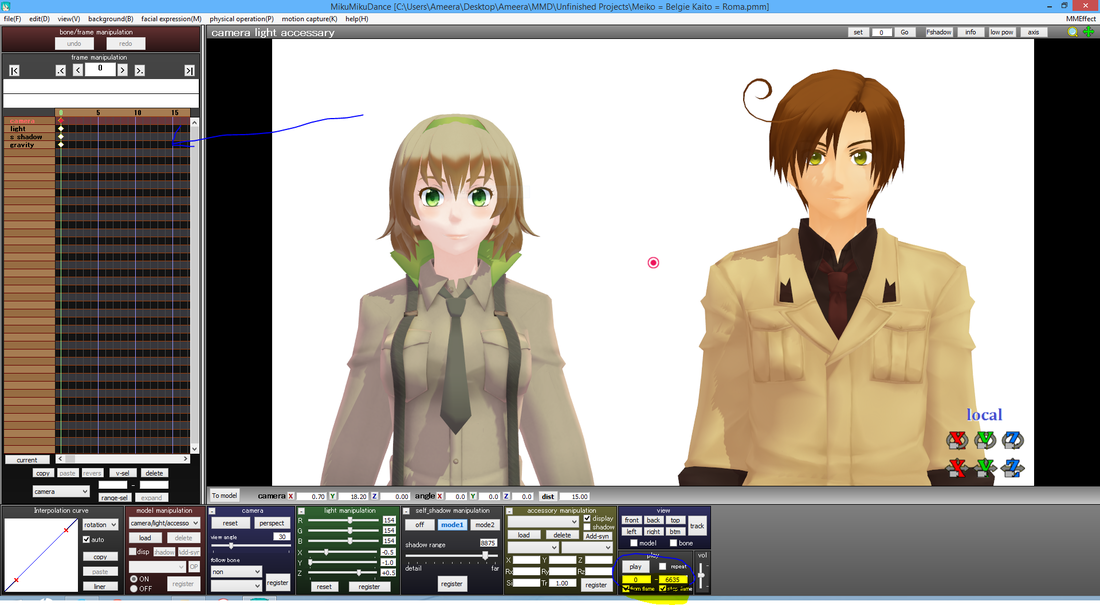
As you can see, this Romano model is named "Null_00".
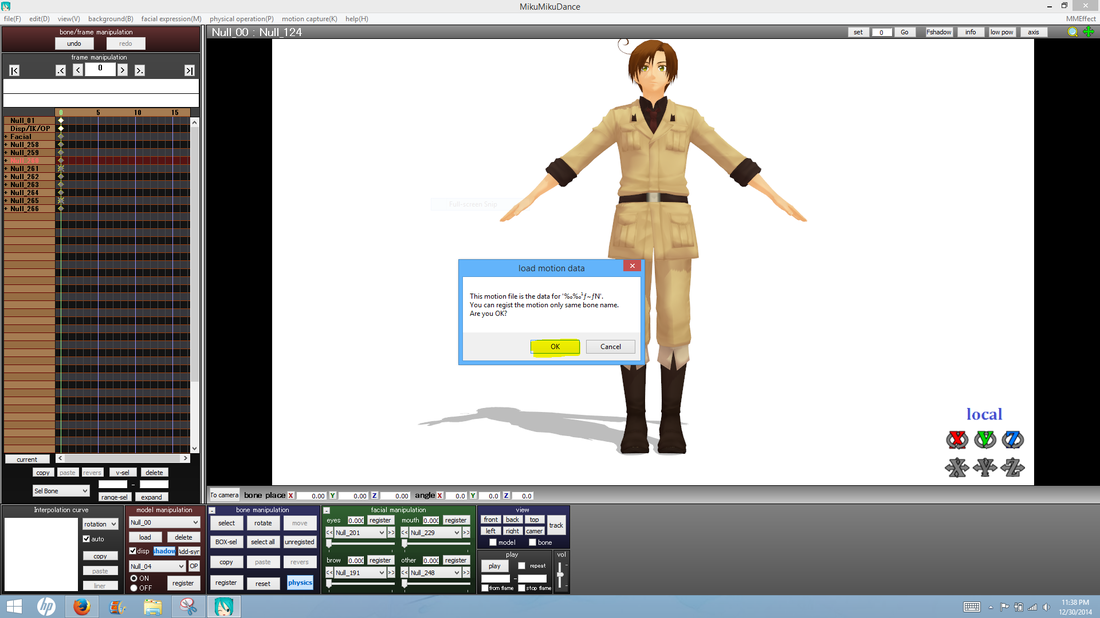
While on the model's screen, go up to the "File" tab and select "Load Motion Data".

Like loading the model, the Browser box should pop up. Search for the motion data you want (motion data files are .vmd files) and select it. A little window will pop up saying something about the motion being made for a different model, just hit "Ok". The screen should stay the same for a moment, then the model should change a different position.
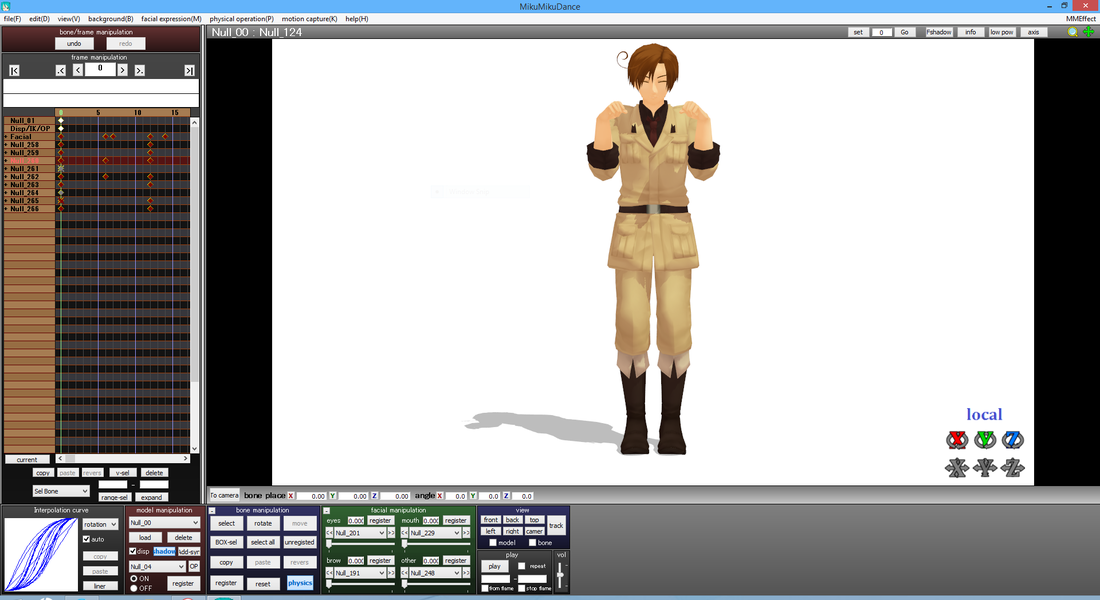
There's the motion!
Tip: If you prefer using an older version of MMD, you need to do these steps:
Physical Operation>Anytime. This turns the physics on at all time, preventing things to bounce when you hit Play.
Tip: If you prefer using an older version of MMD, you need to do these steps:
Physical Operation>Anytime. This turns the physics on at all time, preventing things to bounce when you hit Play.
Now you've added motion data to your model! I'll show you how to add the Camera data next.
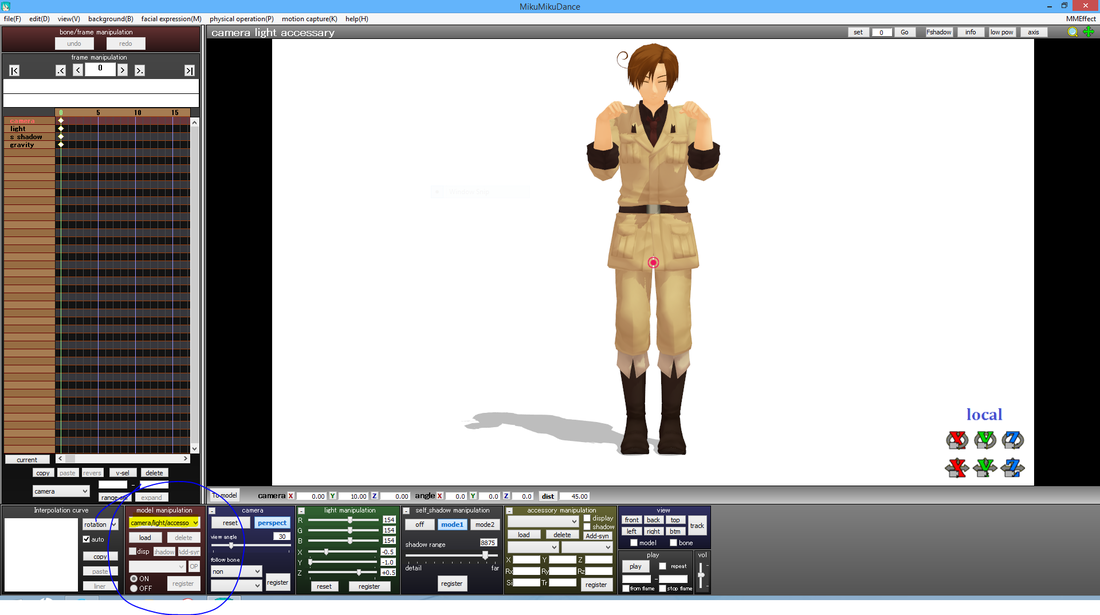
Adding camera motion is basically the exact same as adding regular model motion data. Except now, change the screen to the "Camera/light/accessory" screen. To do that, go to the "Model Manipulation" box at the bottom, click on the down arrow and select "Camera/light/accessory". You are now at the right screen.
Now just go up to the "File" tab and select "Load Motion Data" again. Now make sure you find the camera data and not load the same model motion data. Like before, the screen may stay that way for a second, then the angle will change, and if you have a pretty cool motion, even the lighting may change.
The camera data was loaded. Next you'll add the music.
Tip: If you have a fairly short or fairly tall model, the camera may not match up to their height. Go to the Motion page to learn how to fix this.
Tip: If you have a fairly short or fairly tall model, the camera may not match up to their height. Go to the Motion page to learn how to fix this.
To load the audio into MMD, it is quite simple. It doesn't need to be on any specific screen. Follow these steps:
File>Load WAV File>Select the .wav file you want
The only format of audio files MMD will be able to use are .wav files. If the file is an MP3 or any other type of audio file, it will not work. If the music you have isn't a .wav file, you can easily convert it to the right format. See the WAV Files page for more.
You've made your first MMD! If you were curious about what I made, it was Romano doing the Happy Hands meme, as seen below. (●´ω`●)
Stages/Accessories
If you don't have any stages or accessory files, use the sample stage MMD gave you. Follow these steps when you are trying to find the stage:
Open MMD Folder>UserFile>Accessory>and select the file named "stage01"
This tutorial is teaching you how to load these files into MMD and how to move them around.
Open MMD Folder>UserFile>Accessory>and select the file named "stage01"
This tutorial is teaching you how to load these files into MMD and how to move them around.
First, make sure you're on the Camera/light/accessory screen.

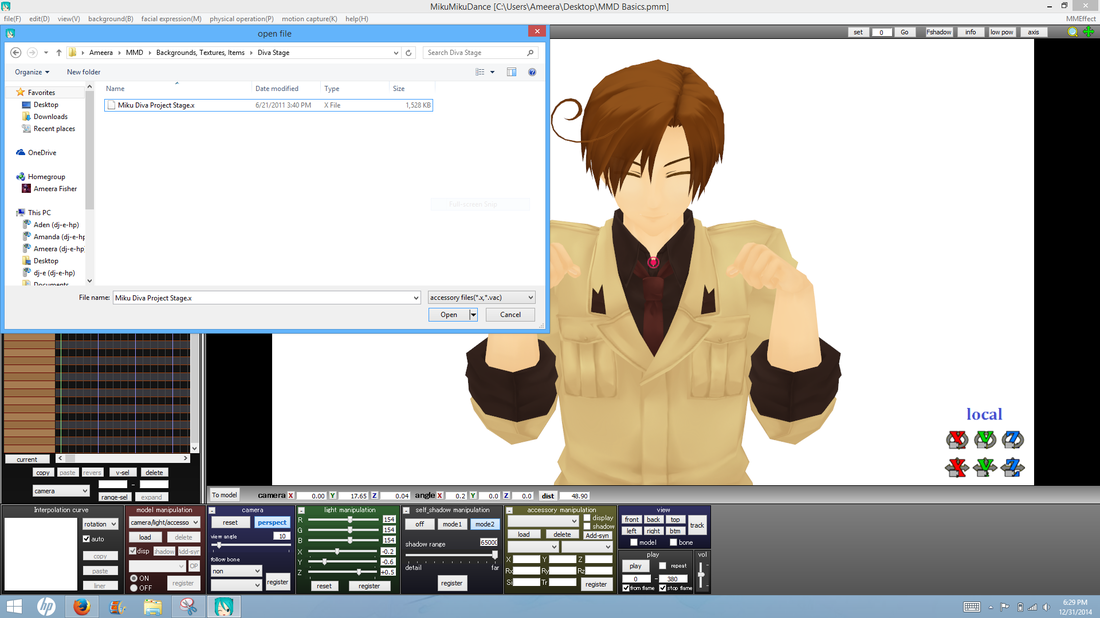
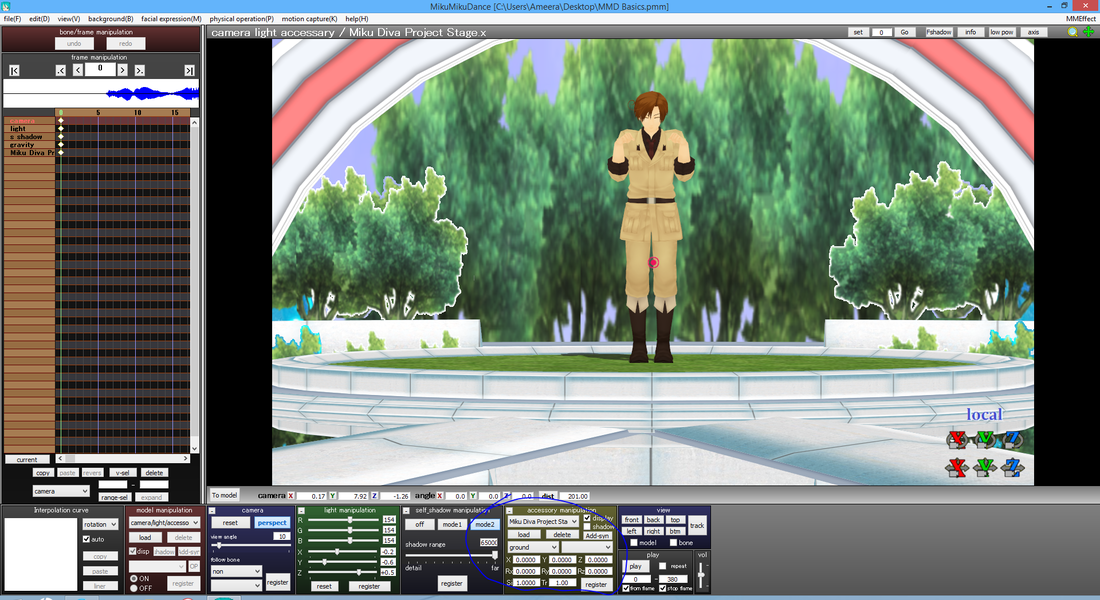
Now when you go to load a stage or an accessory file, you will load it in the "Accessory Manipulation" box. So click "Load" and it'll pull up the browsing window. Just go and select the stage you want. Stages and accessories are typically .x or .vac files, but sometimes they'll show up as .pmd or .pmx, like models. You'd just load them like any other model. Also, most stages have more than one piece to them. Load them all, unless you don't want a certain piece.

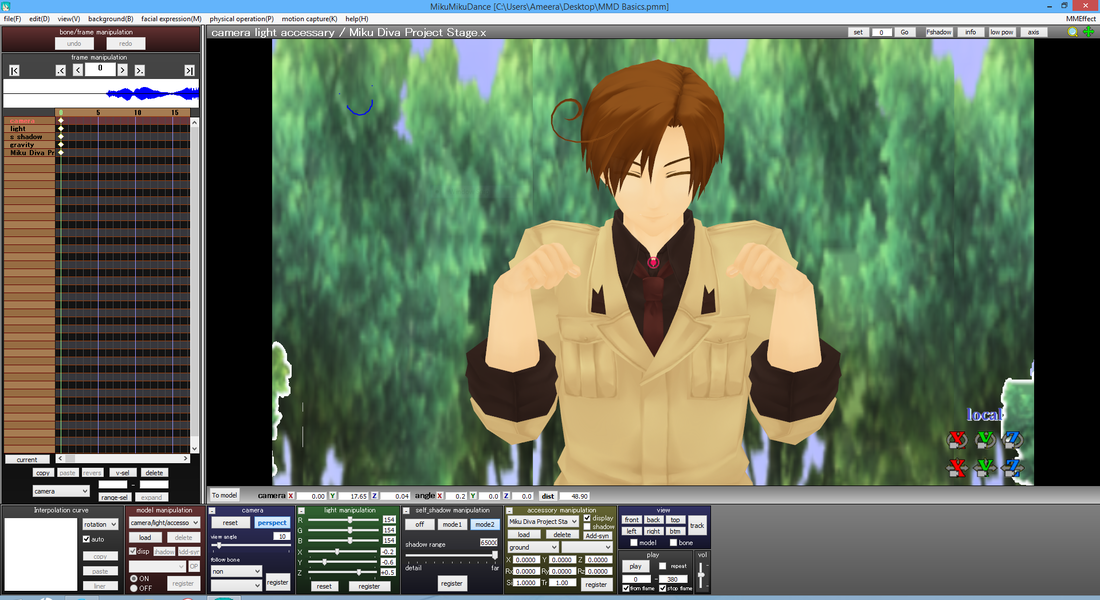
The stage is loaded! Mine looks bad from my camera angle since mine doesn't really need a stage, so ignore that.
Now that the stage is in place, I'll teach you how to move these .x files.
Tip: If the stage you loaded is a model file, you'd move it around using the 'Bone Manipulation' box.
Tip: If the stage you loaded is a model file, you'd move it around using the 'Bone Manipulation' box.
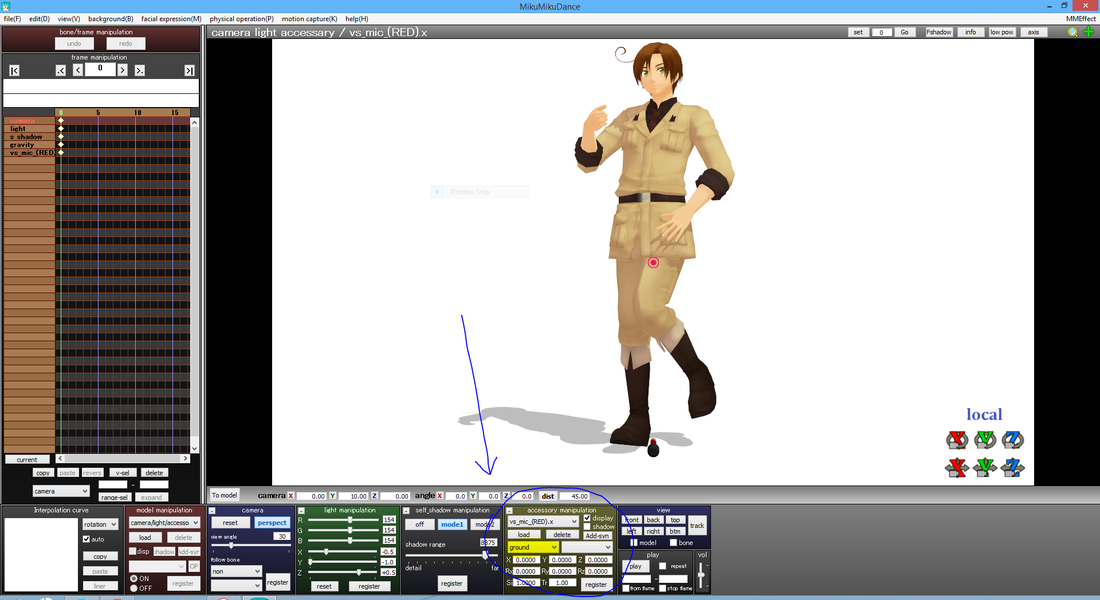
If you look at the "Accessory Manipulation" box, you'll see those boxes labeled with "x", "y", "z", "Rx", "Ry", "Rz", "Si" and "Tr". Those are the different coordinate planes that the stage is located on (except "Si" and "Tr"). Entering a number in each box will change/move the stage in a certain way.
"x" moves the accessory left/right. To make the stage move left, insert a negative (-) symbol before the number. That directs the stage to move it opposite from right. I will be moving the entire stage.
Click the dropdown arrow if you selected more than one file for the stage, and select the part of the stage you want to move.
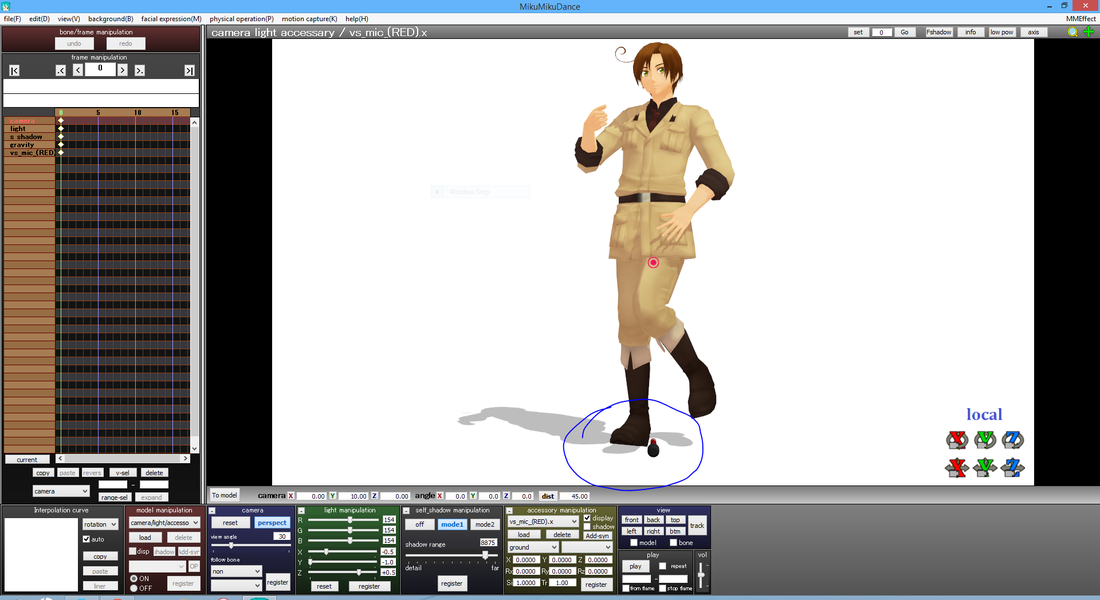
Here's the stage before I change anything. The "x" value is still 0.
"x" moves the accessory left/right. To make the stage move left, insert a negative (-) symbol before the number. That directs the stage to move it opposite from right. I will be moving the entire stage.
Click the dropdown arrow if you selected more than one file for the stage, and select the part of the stage you want to move.
Here's the stage before I change anything. The "x" value is still 0.
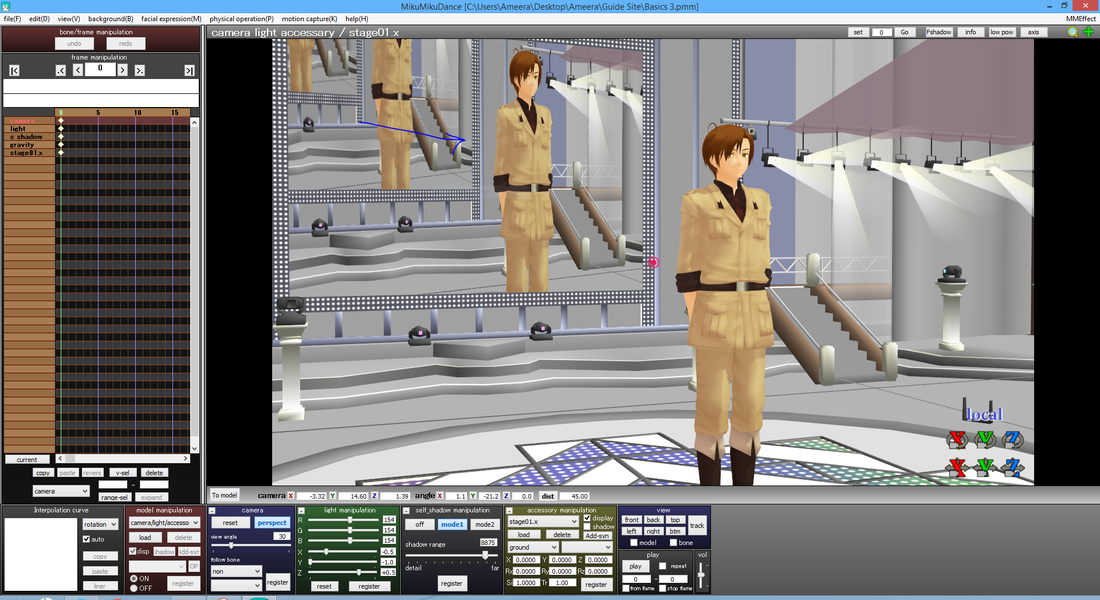
Now below is where I change the "x' value to 5. It has moved right.
If you want the stage to stay in that spot, make sure you hit "register" after every change you make, or it will go back to the way it was before you moved it, once you hit Play. Hitting Play will only play what has been registered (hard to explain, but I'm certain you'll learn this the hard way).
If you want the stage to stay in that spot, make sure you hit "register" after every change you make, or it will go back to the way it was before you moved it, once you hit Play. Hitting Play will only play what has been registered (hard to explain, but I'm certain you'll learn this the hard way).

Below I changed the "x" value to -5. The platform moved left.

Now that you know that much, you can kind of understand how these work hopefully.
"y" moves the stage up and down-- to move the stage downwards, you put a negative (-) before the number.
"z" moves the stage forward and backward-- to move the stage forward, you put a negative (-) before the number.
Test out the "Rx", "Ry" and "Rz" boxes. They will move the stages around in different ways according to where the axis sits. (It's just hard to explain, you probably only need these three for adjusting accessories)
"Si" stands for "Size". As you can guess, the stage/accessory can either be enlarged or made smaller. This box is always at 1, so to make something bigger, just insert any number bigger than 1, and to shrink it, just insert a negative (-) symbol before the number.
"Tr" stands for "Transparency". From my understanding, this only works for loading effects with MME installed, so for stages and accessories, this option is completely useless. Just ignore it, it won't let you change anything.
If you are wanting to move an accessory, you'll probably want to use all the boxes. Let's say you want to attach a microphone to your character's hand, well let me show you how that's done.
(You have a microphone accessory in the UserFile folder, it's in the same folder as the stage MMD comes with and the file is named "mic".)
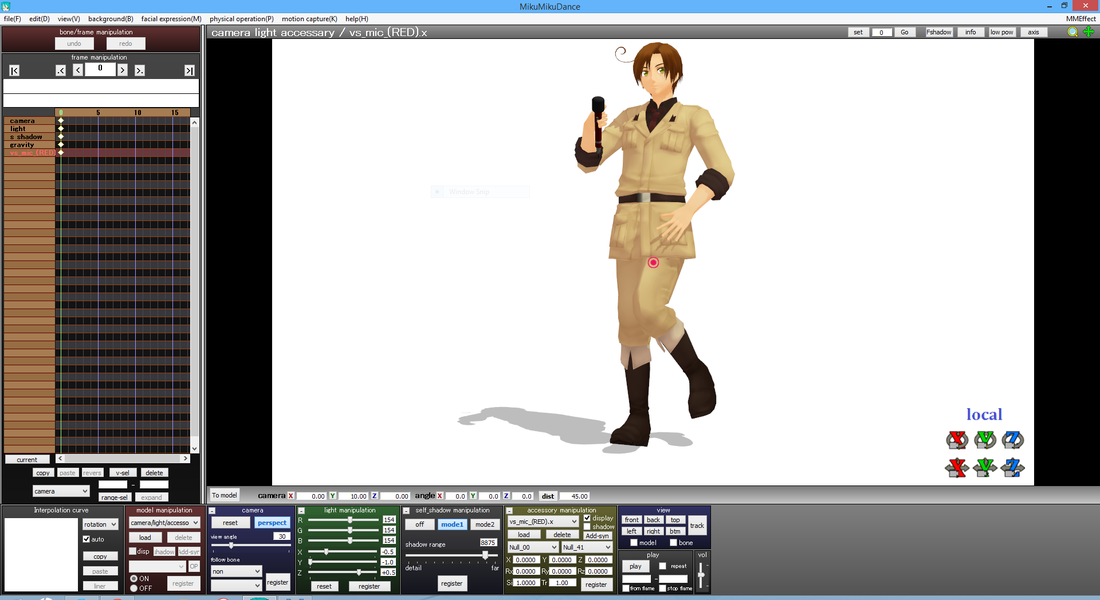
First, load the accessory. Most accessories will be loaded onto the floor.
"y" moves the stage up and down-- to move the stage downwards, you put a negative (-) before the number.
"z" moves the stage forward and backward-- to move the stage forward, you put a negative (-) before the number.
Test out the "Rx", "Ry" and "Rz" boxes. They will move the stages around in different ways according to where the axis sits. (It's just hard to explain, you probably only need these three for adjusting accessories)
"Si" stands for "Size". As you can guess, the stage/accessory can either be enlarged or made smaller. This box is always at 1, so to make something bigger, just insert any number bigger than 1, and to shrink it, just insert a negative (-) symbol before the number.
"Tr" stands for "Transparency". From my understanding, this only works for loading effects with MME installed, so for stages and accessories, this option is completely useless. Just ignore it, it won't let you change anything.
If you are wanting to move an accessory, you'll probably want to use all the boxes. Let's say you want to attach a microphone to your character's hand, well let me show you how that's done.
(You have a microphone accessory in the UserFile folder, it's in the same folder as the stage MMD comes with and the file is named "mic".)
First, load the accessory. Most accessories will be loaded onto the floor.
For things like this, the first six boxes are your friends. There is also another tool that is extremely important when you want to attach items to a model, which is the drop down menu that should currently say "ground".
This tells the accessory what it should attach to, and the box next to it will list bones that the item can attach to. For example, I will click down and it'll have Romano listed as "Null_00". I want this microphone attached to him, so I would click on that and on the side it'll list the different bones I can attach it to.
Before I do that, though, I need to think about where I want the microphone attached.
I want it attached to his middle finger on the right hand, and because my model doesn't have English labels for bones, I will go to the model screen, click "Select" under the "Bone Manipulation" box. This will show all the bones.
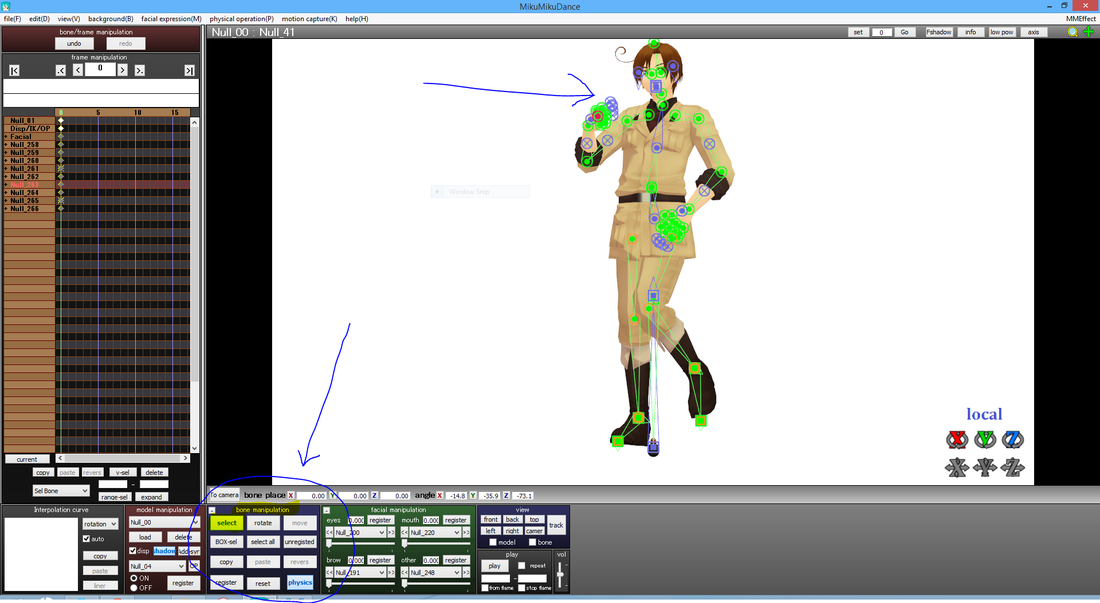
To see what the bone is named, scroll to get closer and click on the bone you want, it'll turn red. In the top left corner, it will display the bone you selected.
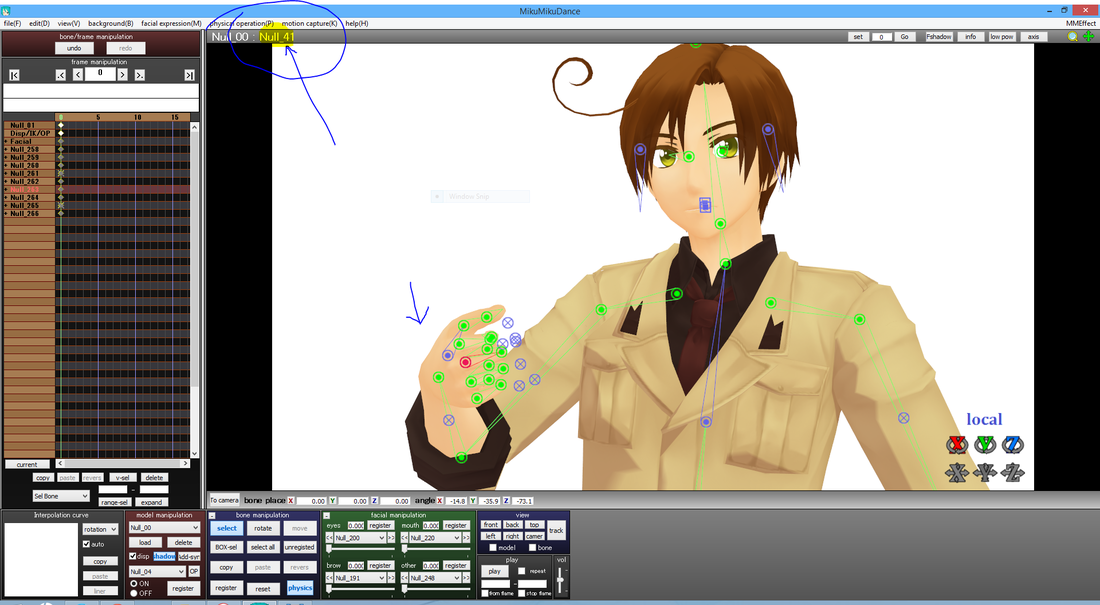
So the bone I want the mic attached to is named "Null_41".
(Yours is most likely different, so use the name of yours, not mine.)
Now go back to the Camera/light/accessory screen, re-attach the mic to your model (if you registered it, it didn't move, but if it went back just re-attach it and register), then on the right box, go down until you find the bone you wanted to attach it to, in this case I want to select "Null_41".
(Because this tutorial is awful I'll get a close up of what I ended up with)
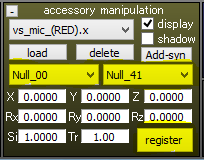
Make sure you hit register when you want it to stay that way!
Since we attached this to a bone, which may I remind you is technically inside the model, the mic is going to be inside of his hand. Thankfully we have our little boxes to help us fix that!
I got lucky and the maker of these special mics I downloaded from deviantART included the numbers I put into the boxes for them to fit correctly. You can download these mics at the Downloads page. I am sure this guide is not the same for all mics, so you will have to adjust yours a little, but here's what they included:
X = 0.15, Y = -0.250, Z = -0.350, Rx = 0, Ry = 0, Rz = -100.00, and Si/Tr stay 0.
Most accessories/stages don't have this, but if they do, it's usually located in the ReadMe file that comes with the download. This is also needed for certain effects with MME.
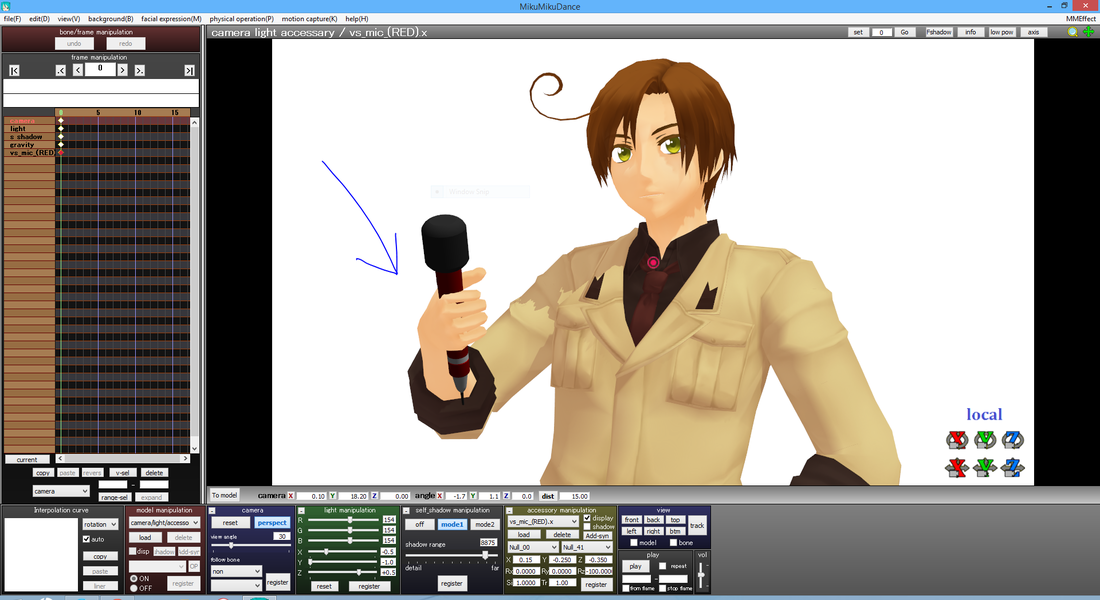
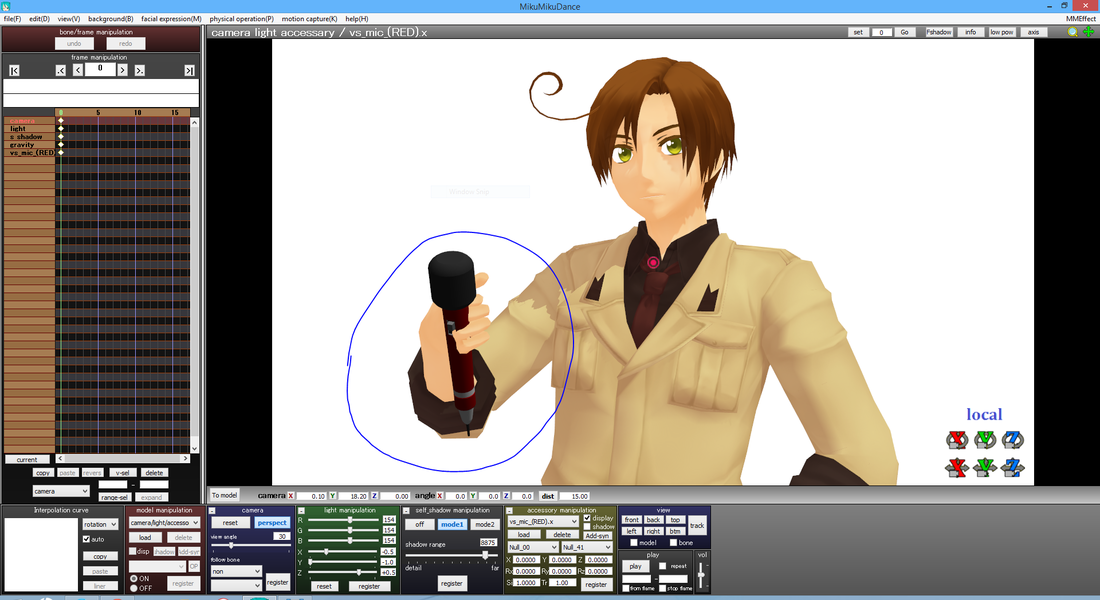
For the most part the mic is in the right place, but it still doesn't look perfect on him. He does have mans' hands, so they're different from the original model. Just adjust the mic by playing around and see what works. Even change the pose around the hand to fit the mic (see Motion page for moving models and making your own poses/motions).
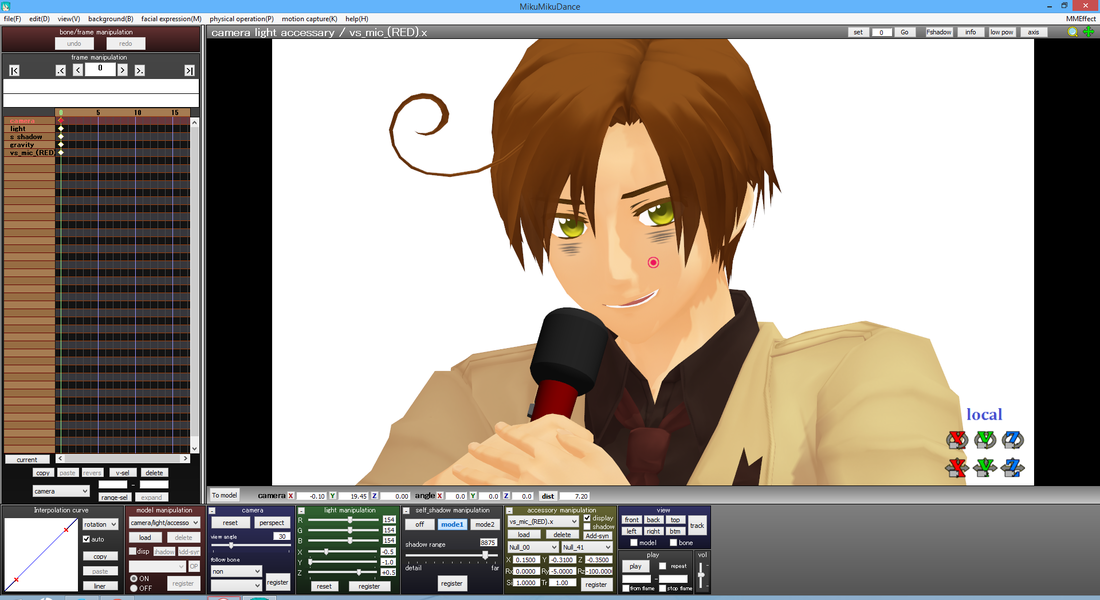
Then after some testing with trial and error, you should finally get your accessory positioned right and ready to go! (Apologies for the lazy posing...)
Using Images/Videos for Backgrounds
Say you don't want a stage, and you'd rather just use a picture or video of yours as the background. Well, that's what I am going to show you here!
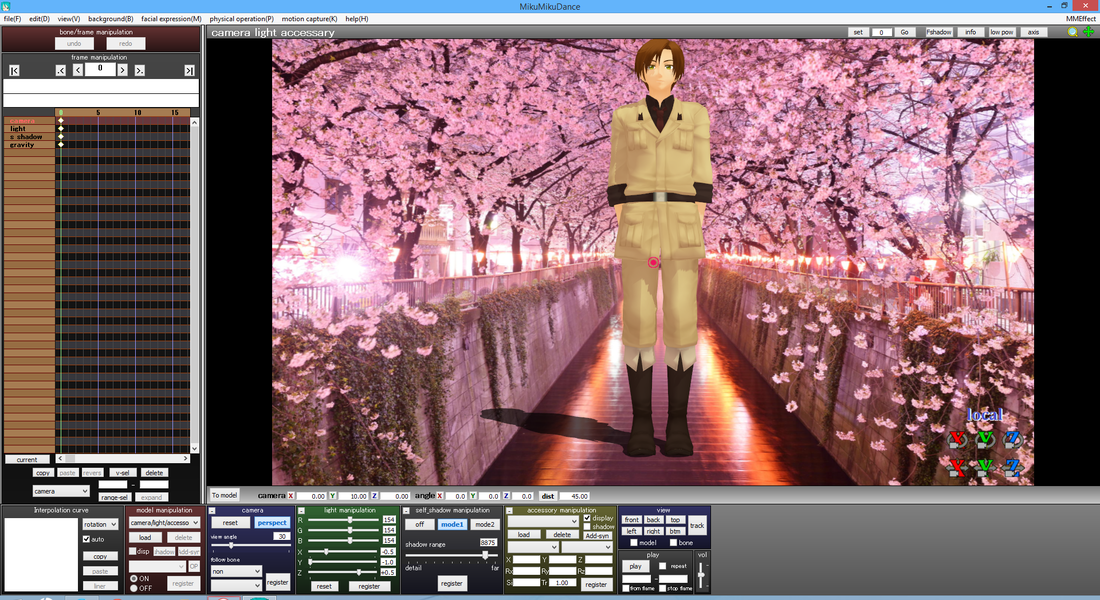
To load an image, it's extremely simple: Background>load background picture file
For a video: Background>load background AVI file
If you'd rather have a black background: Background>Black background
As you notice, for videos it makes you do an .avi file. That's the same video file that MMD has to render your animations into.
So unfortunately this option is very limited as well, considering that every time I attempted to load a video it has an error saying it wasn't correct, when indeed it was an .avi file. I've looked for answers to this problem, and people have said to re-convert the file using a different codec. I may make a tutorial for this later on if I get it to work properly.
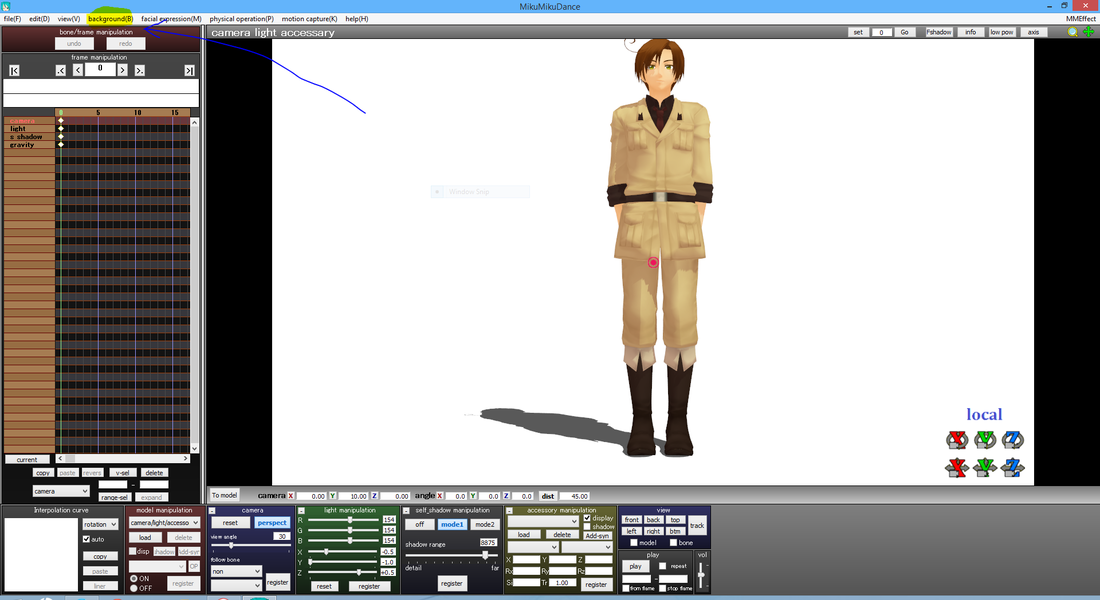
Below is when I loaded an image as a background.
For a video: Background>load background AVI file
If you'd rather have a black background: Background>Black background
As you notice, for videos it makes you do an .avi file. That's the same video file that MMD has to render your animations into.
So unfortunately this option is very limited as well, considering that every time I attempted to load a video it has an error saying it wasn't correct, when indeed it was an .avi file. I've looked for answers to this problem, and people have said to re-convert the file using a different codec. I may make a tutorial for this later on if I get it to work properly.
Below is when I loaded an image as a background.
Below is when I tried to use an .avi.
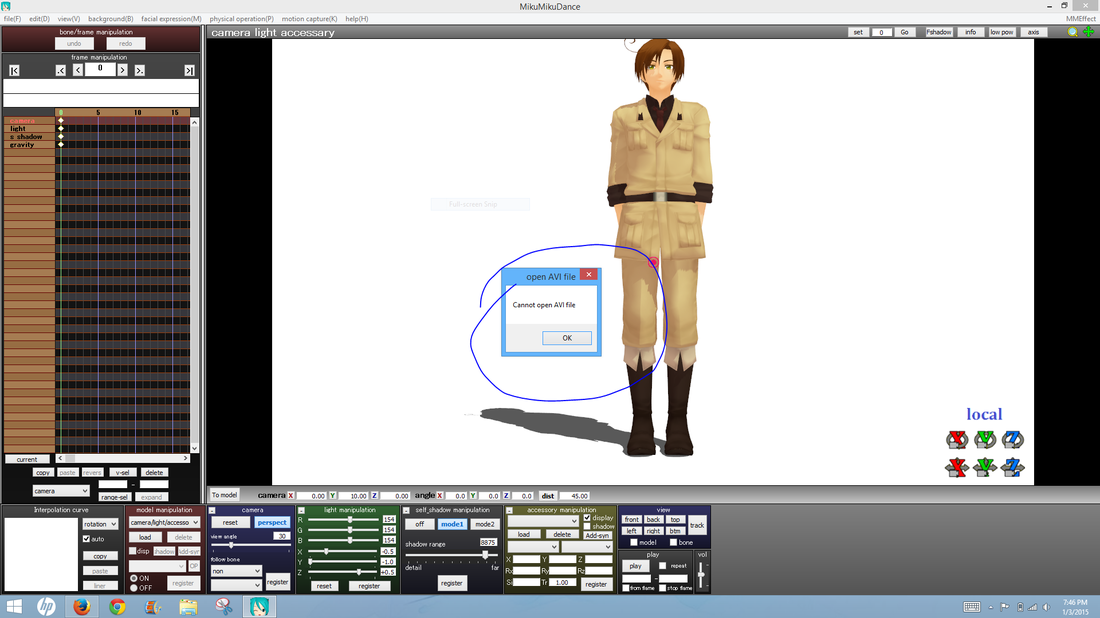
I rarely see people use video backgrounds, so you aren't missing out.
Most times the black background is used when an effect changes it, or when you want to render your picture with a transparent background like the ones I used for the models on the Downloads page.
For an extra side note with this tutorial, look below. Do you see the area I filled in with scribbles? Some stages have white squares or areas in it as such. It's not a bad thing, in fact it's a special feature! That means you can have a big screen of the MMD right behind them, for example it starts white, then after I turn on the setting to show the camera:
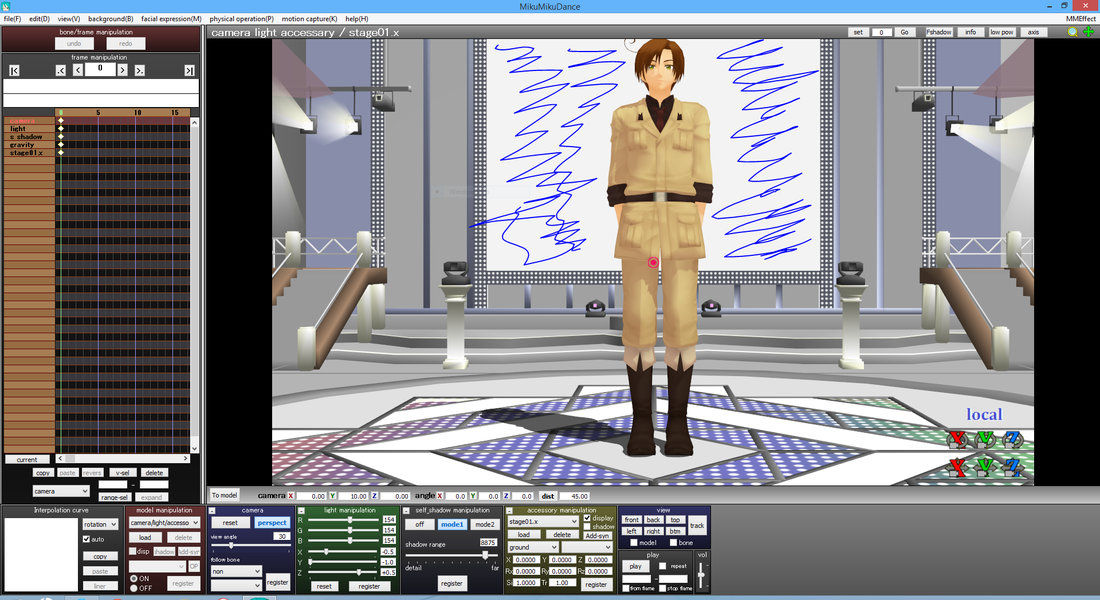
This is called the screen capture mode. To turn this on, follow thee steps:
Background>ON.mode01 or ON.mode02. I think Mode 01 makes the screen more squished up to fit everything in (above I used Mode 01, it's not as nice as Mode02), whereas Mode 02 stretches it out to look more natural. I usually use the first one with group dances and the second one is better for a single dancer. ON.mode03 is only necessary when using the KeyScreen effect in MME. It's hard to use, but people have made tutorials for it on deviantART. Just look up how to use the KeyScreen effect.
Background>ON.mode01 or ON.mode02. I think Mode 01 makes the screen more squished up to fit everything in (above I used Mode 01, it's not as nice as Mode02), whereas Mode 02 stretches it out to look more natural. I usually use the first one with group dances and the second one is better for a single dancer. ON.mode03 is only necessary when using the KeyScreen effect in MME. It's hard to use, but people have made tutorials for it on deviantART. Just look up how to use the KeyScreen effect.
Rendering Your MMD
Now this is your final step! This is for rendering your MMD into a video or an image, otherwise known as "saving it as a video". Render is the correct term for this.
First we will start with the video since this is more difficult. You need to make sure you know how long the MMD is to begin with, because when you go to render it it will ask what frames you wish to render. It's easy, just play your MMD and as soon as it finishes, pause it.
(To be able to pause just check the two boxes below the frame number boxes like I did below)
(To be able to pause just check the two boxes below the frame number boxes like I did below)

|
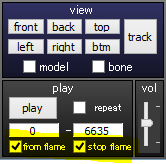
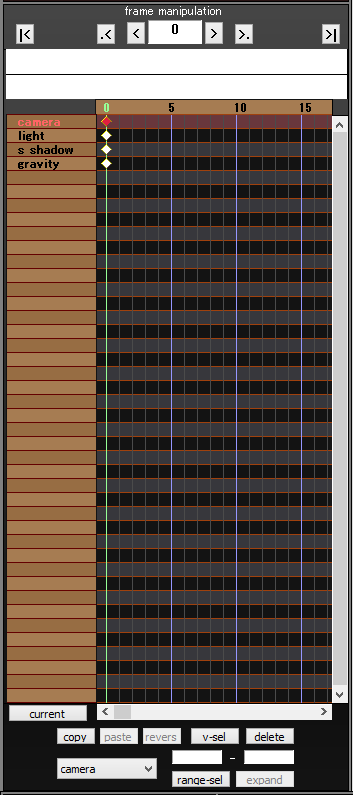
- To pause, check the "from frame" and "stop frame" boxes. Now whenever you hit play during an MMD it'll stay in the same spot rather than jump back to the beginning. - On the left is the Frame Manipulation box, this is extremely important when navigating through your MMD. An animation consists of frames. Technically whenever something moves, it creates a frame. Frames are like the pictures that you put together and play in fast forward to see movement. You know how in elementary school you'd take a sticky note pad and draw a ball moving slowly on each one, and when you flip through it it looks like a bouncing ball? Well each of those sticky notes is a frame, and the bouncing ball is the animation. (I tried to explain that as best as I could) - When you pause your MMD at the end, it should show a green number with a line going down. That's the frame you stopped on. 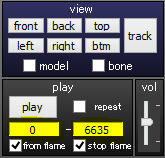
- See that? This means your MMD is from frame 0 all the way to frame [insert your frame number]. Mine goes from 0 to 6635, mine is pretty long! - Above is what you need to do. In those boxes, make the first one 0 and the second one whichever frame you stopped on. Mine is 6635. - Make sure to leave the boxes checked underneath. - That's pretty much the hardest part! After a while of playing with the Frame Manipulation it gets way easier to where you can just skim through and find the ending without having to watch it. You can also start from wherever you'd like in the MMD too, it doesn't have to be the very beginning. Just find the frame you want to start with and put that in the first box. Although, the audio will not render with the video, so it'll have no sound. Starting with 0 is really the only option unless you can edit it in another program. |
Before you render, make sure you're on the Camera/light/accessory screen, and that the frame is at 0 on Frame Manipulation.
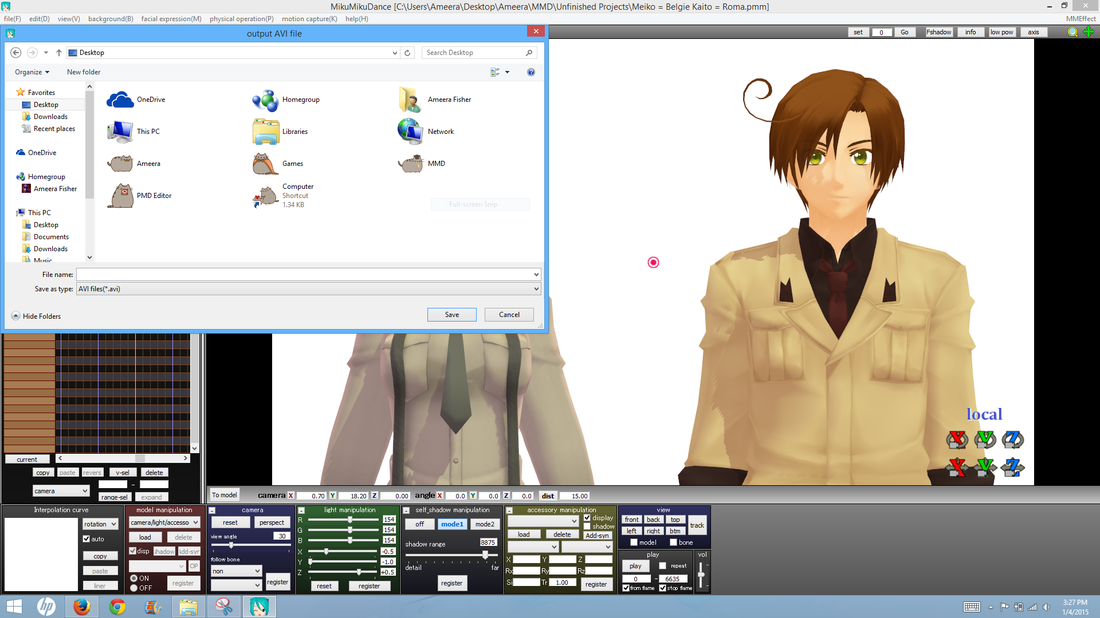
Now, to render, go to File and click render to AVI file.
Now, to render, go to File and click render to AVI file.
It'll ask you where to save your MMD, just save it to your desktop or wherever you want it. Name it, and hit Save.
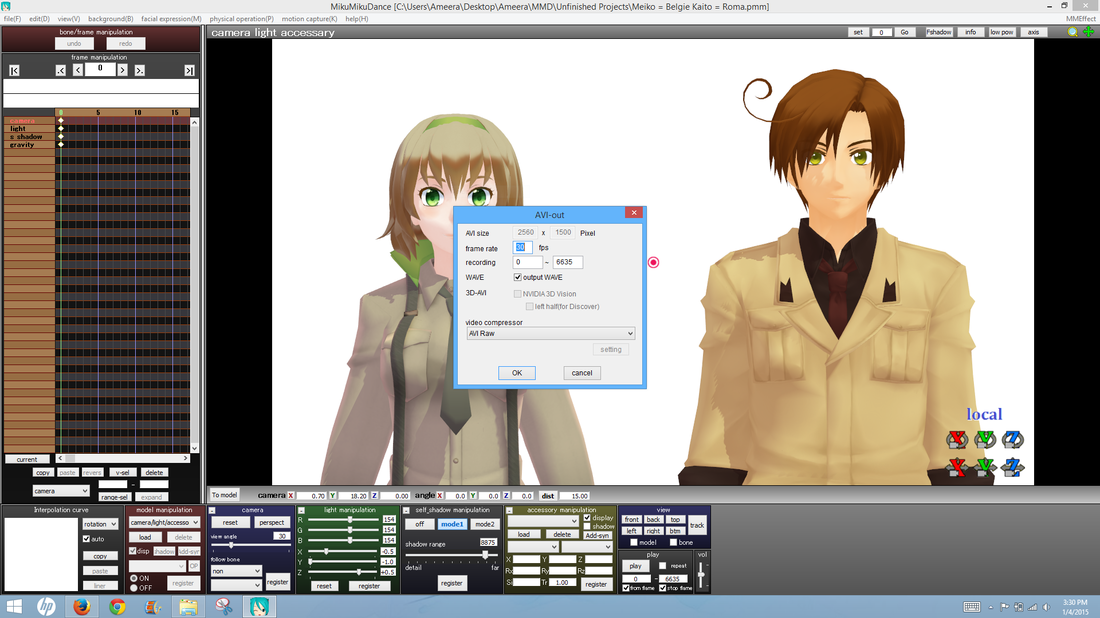
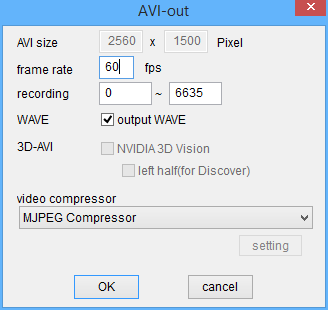
|
To make a good looking MMD, change 30 fps to 60. Fps stands for "Frames Per Second". This means there will be more frames and movement for each second of the video, which is a lot more clear and clean. Tip: If you by any chance use Blender, 60 fps will speed up the animation. You should use 24 or 30 fps for programs like it instead. The recording should already have those frame numbers you entered under the Play button earlier. Make sure you check output WAVE, this will include the audio file with it. If not checked, there won't be any sound. Then lastly, the video compressor is whatever you want. I haven't tried every one because there are a lot to choose from, but I use one that isn't included in MMD called Ut Video Codec. You'll have to download it on the Downloads page under "Video Compressors/Codecs". Before I used this special codec, I used MPJEG Compressor, and before that I used Cinepak Codec by Radius. The reason I switched from Cinepak was because it took forever and it wasn't the best quality, and MPJEG is pretty good and fast. |
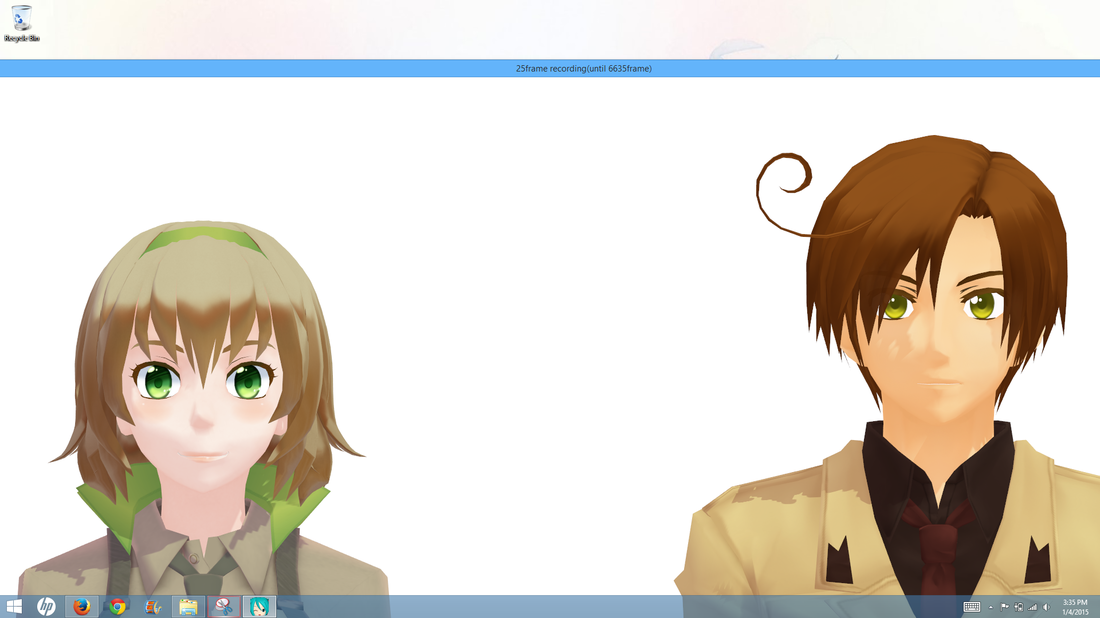
Now MMD will disappear and it'll show a large window that starts counting up frames. This is "recording" the MMD as it plays through, saving each frame and sticking it together to put into a video. When it's done, MMD will pop back up and the recording window will disappear, and wherever you saved your video it will be there!
Pictures are much easier to render. All you do is go to File and render to picture file. It'll tell you to name it, and once you do, a "recording" screen will pop up for about a second. Once it's gone, the picture will be where you saved it! Now remember how I mentioned screen size? Well if your image is solid black, that means your computer cannot render images that large. Change the screen size to something smaller. If you want transparency in the background, make the background black and render it as a .png file.
Pictures are much easier to render. All you do is go to File and render to picture file. It'll tell you to name it, and once you do, a "recording" screen will pop up for about a second. Once it's gone, the picture will be where you saved it! Now remember how I mentioned screen size? Well if your image is solid black, that means your computer cannot render images that large. Change the screen size to something smaller. If you want transparency in the background, make the background black and render it as a .png file.
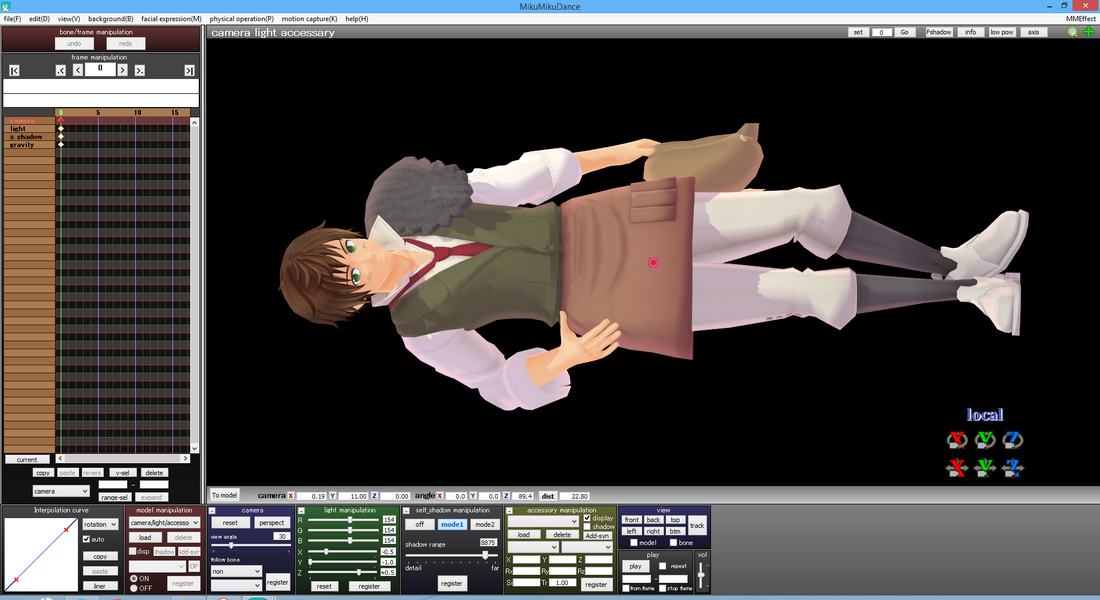
From here, render it, and then go to it and rotate it so they're standing up right. Now you have a nice transparency!
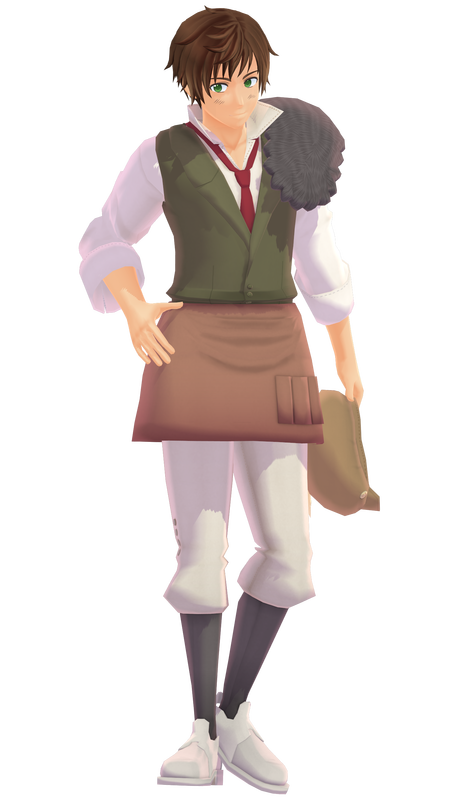
Spain model by UniDX, costume by nononoP, edit by me.
Congratulations!
Congrats! You've completed the MMD Basics tutorials and you're on your way to becoming a very successful MMDer! Now you know how to:
- Download and successfully open MMD
- Load and use models, stages, accessories, motion data/camera data/pose data, .wav files
- Give your MMD a better appearance
- Use the screen capture feature on stages
- Use images/.avis as backgrounds
- Render your animation into a video or picture
I hope you learned a lot from this, and if you have any questions on anything, please send me an email! I do this so beginners can learn animation easier and without the worries of "high-class MMD users" giving them crap for not doing well. This community is for anyone willing to put effort into their animation, and I want you to feel welcome into it. Thanks for your time!
Models featured on this page:
Romano by Nachi Akira
Belgium by nononoP
Spain by UniDX, costume by nononoP, edit by me
Some poses were by reon046
Romano by Nachi Akira
Belgium by nononoP
Spain by UniDX, costume by nononoP, edit by me
Some poses were by reon046
